Editor and assistant features for security work
Hacker Sidekick is useful for blue, purple, and red team work, secure development, and review, because you get a full editor, terminal, and AI assistant in one product.
The sections below are a concise overview of what the shipping app includes. For sign-in and updates, start with the Hacker Sidekick app.
Video walkthrough: Getting the Most out of Hacker Sidekick (0.3) discusses model routing, workspace indexing, threat intel MCP, and related settings from the latest update.
Workbench: editor, repo, and project
The workbench is the file and project surface: folders, open editors, panels, and commands.
- Version control (Git) - Source Control for stage, commit, and push, diffs, file history, branches, and merges. You keep a clear trail when you triage incidents, review suspicious changes, or prepare patches.
- Workspaces - Multi-root workspaces, folder-specific settings, and the trusted / restricted workspace model to reduce risk when you open code from an untrusted source.
- Syntax, semantics, and linting - Syntax highlighting and, where a language extension provides it, Go to Definition, find references, and the Problems view for diagnostics (linters, compilers, and security tools wired as tasks or language servers). Semgrep and other scanners often integrate as CLI tasks or extensions.
- Previews and reading - Markdown preview and other preview or simple browser flows from the workbench and from extensions, so you can read reports, READMEs, and PoC notes next to the terminal.
- Terminals and tasks - The integrated terminal runs in the same window as the repo. Use it for one-off
curlchecks, test harnesses, package managers, and your usual CLI tools without leaving context. Treat shells the same as any production shell for secrets and path safety.
Extensions - You can add compatible editor extensions the same way as in other modern code editors, subject to your org policy, to add more languages, debuggers, and static analysis.
AI assistant: modes, tools, MCP, auto-approve, and checkpoints
The AI assistant is built into the app. Configure it under Hacker Sidekick in settings.
Settings are grouped under Hacker Sidekick (Connection, Workspace Indexing, MCP, Auto-Approve, Checkpoints, Experimental, About, and more depending on the version you run).

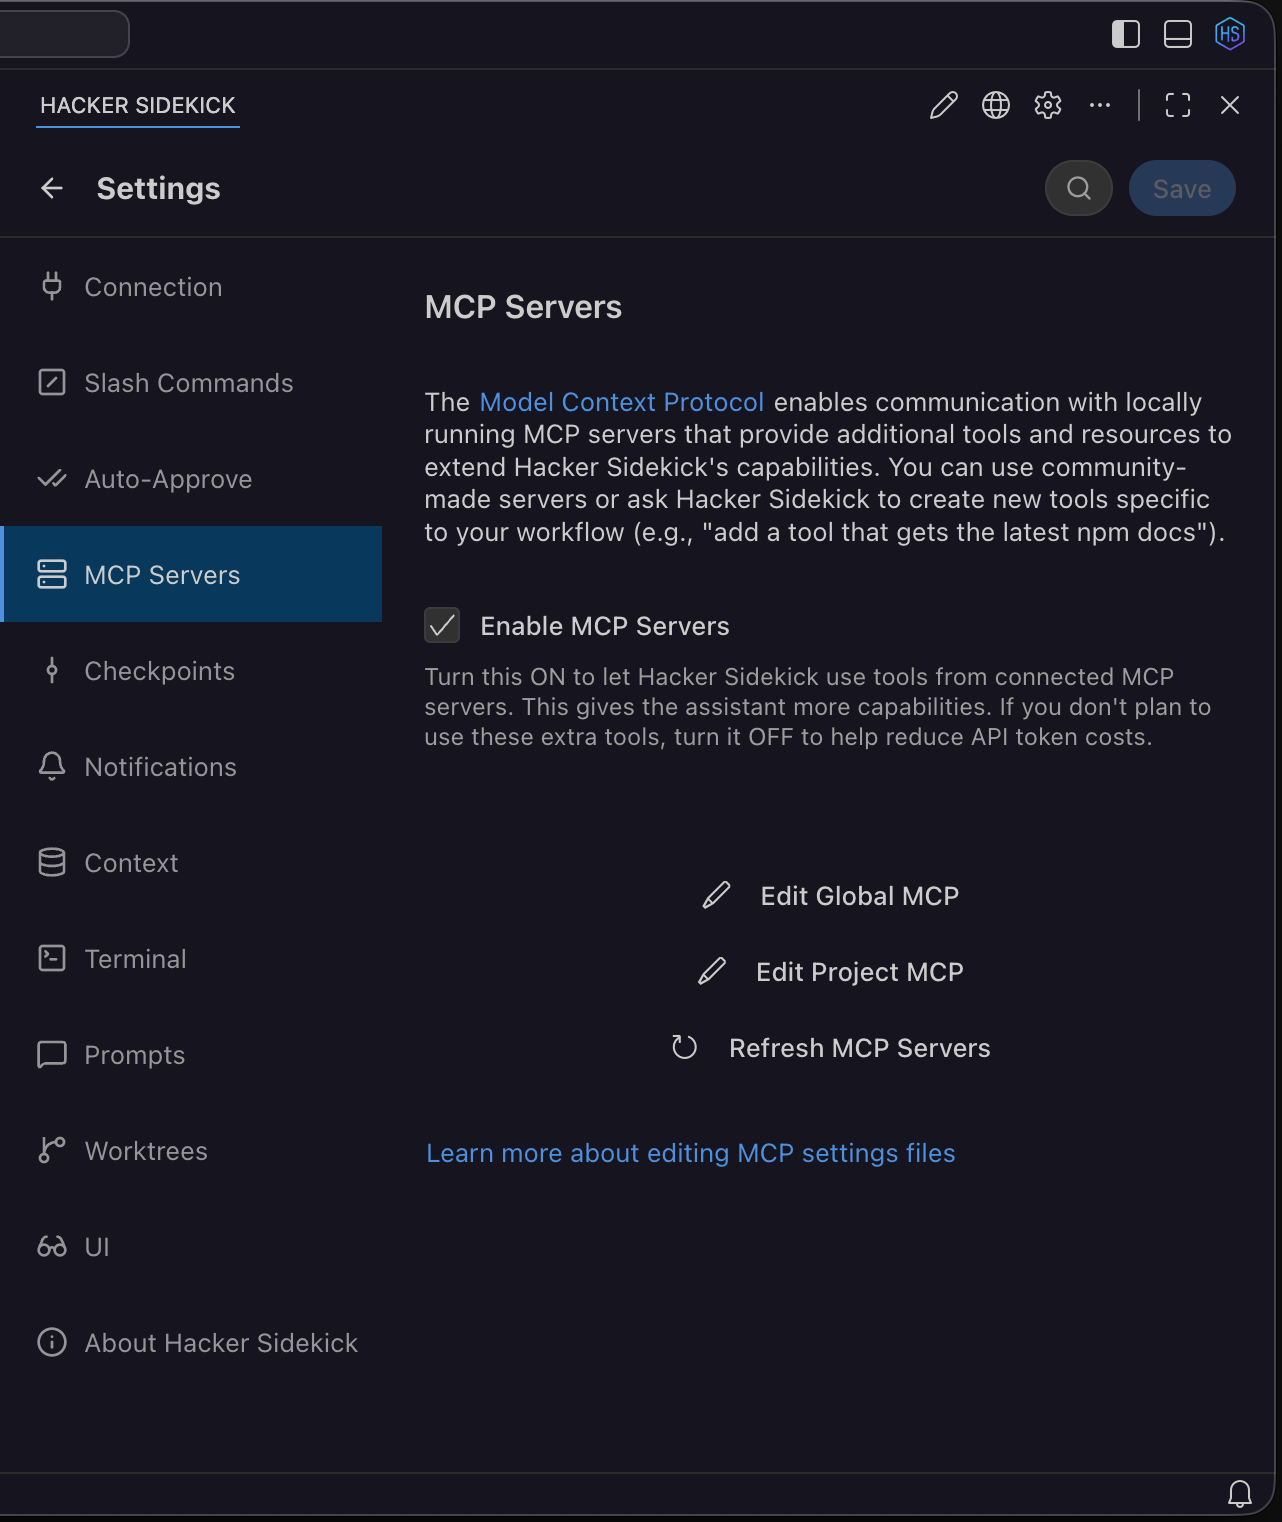
Model Context Protocol (MCP)
MCP runs separate tool servers (local processes) that the model can call through the assistant. That is how you connect scanners, issue trackers, your team’s web services, or custom scripts without pasting everything into the prompt.
MCP is on by default. In MCP Servers settings you can turn it off if you do not need tool servers and want to reduce token use. Add global or project server definitions, and use the MCP tab in the task sidebar to manage refresh, connection status, and Always allow on individual tools when you trust that server and tool.
Public threat intelligence (hacker-sidekick-public-intel)
The shipping app includes a global server hacker-sidekick-public-intel with dozens of security research tools (Shodan, VirusTotal, MITRE ATT&CK, NVD, AlienVault OTX, AbuseIPDB, and more). Open Settings → MCP Servers, select the server, and use the Tools tab to allow individual tools.
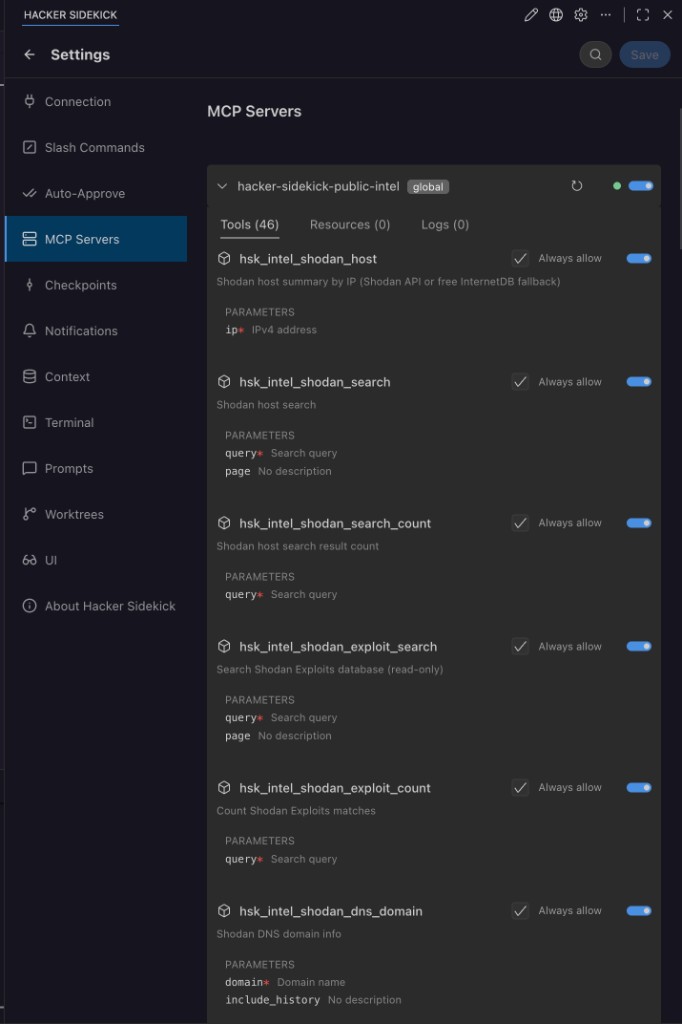
You can ask the assistant to look up a CVE, check a blocklist, pull Shodan results for a host, or map indicators to MITRE techniques without leaving the editor. Pair Always allow on trusted tools with auto-approve when that matches your policy.
MCP is an open protocol. Your security review should focus on which servers and tools you allow on sensitive repositories.
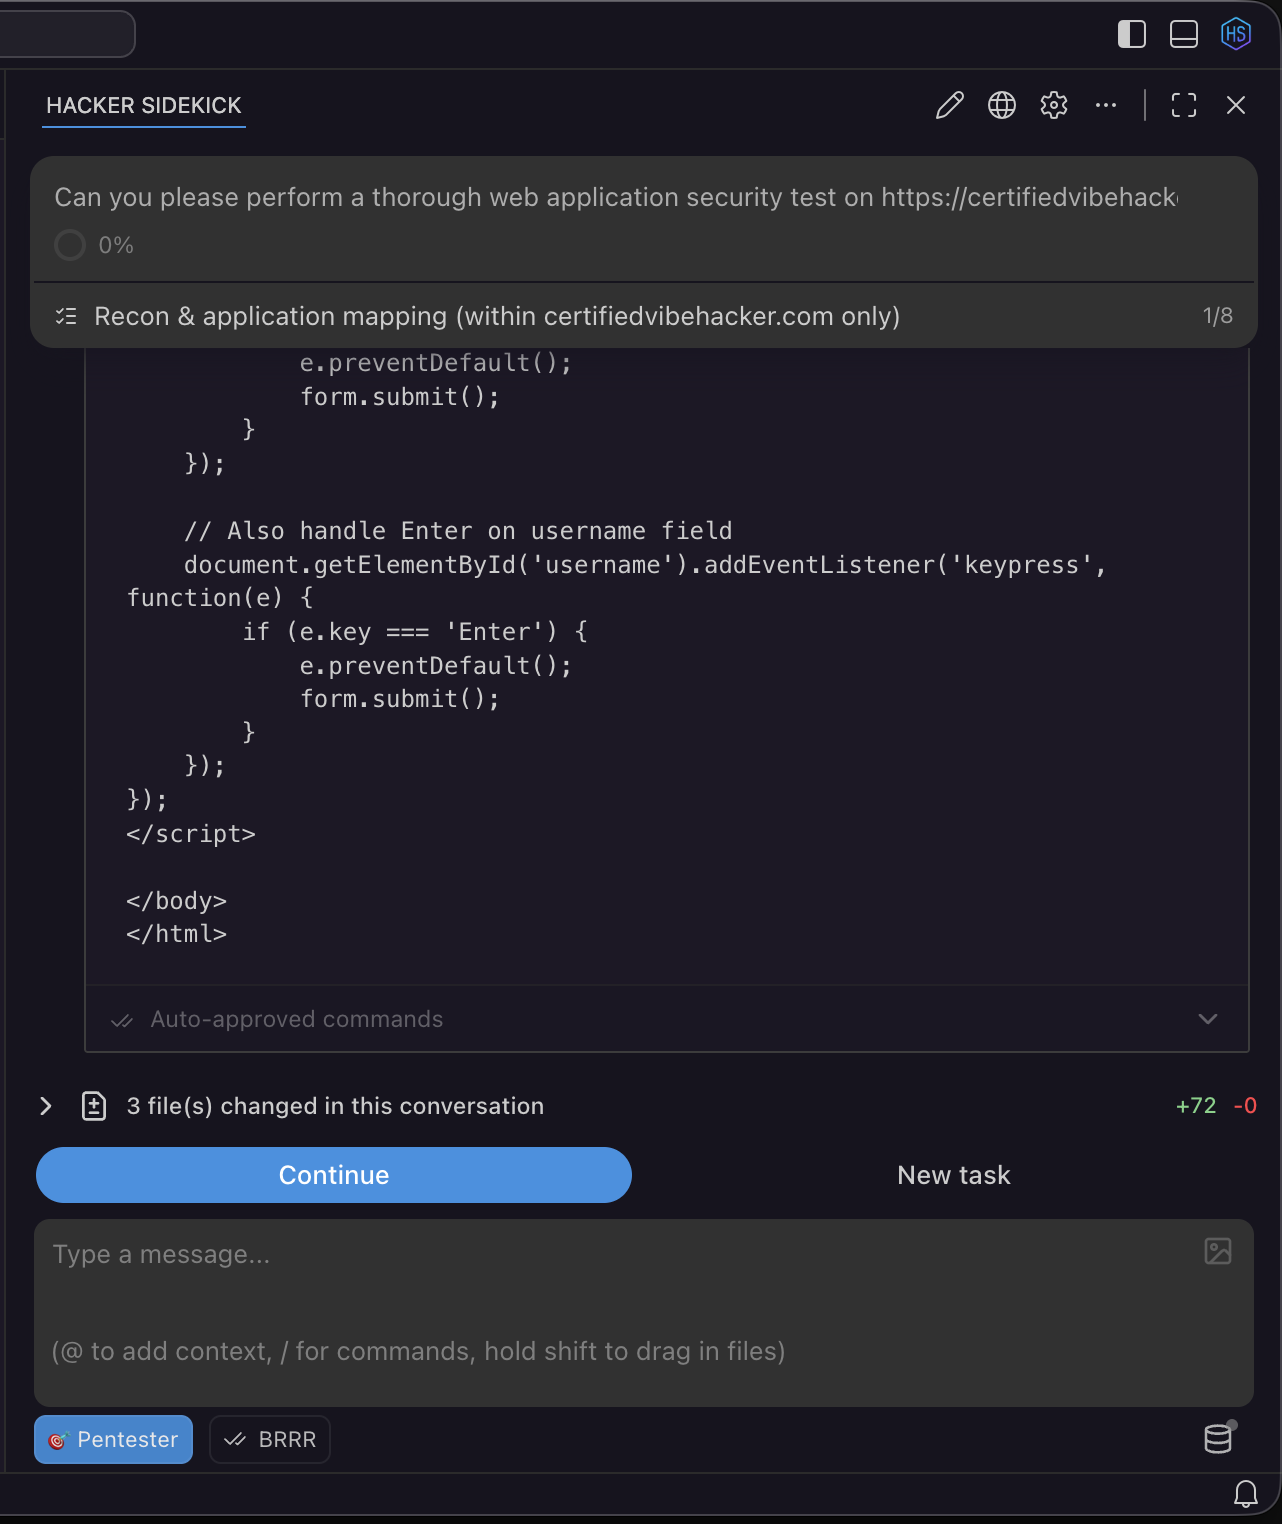
Auto-approve
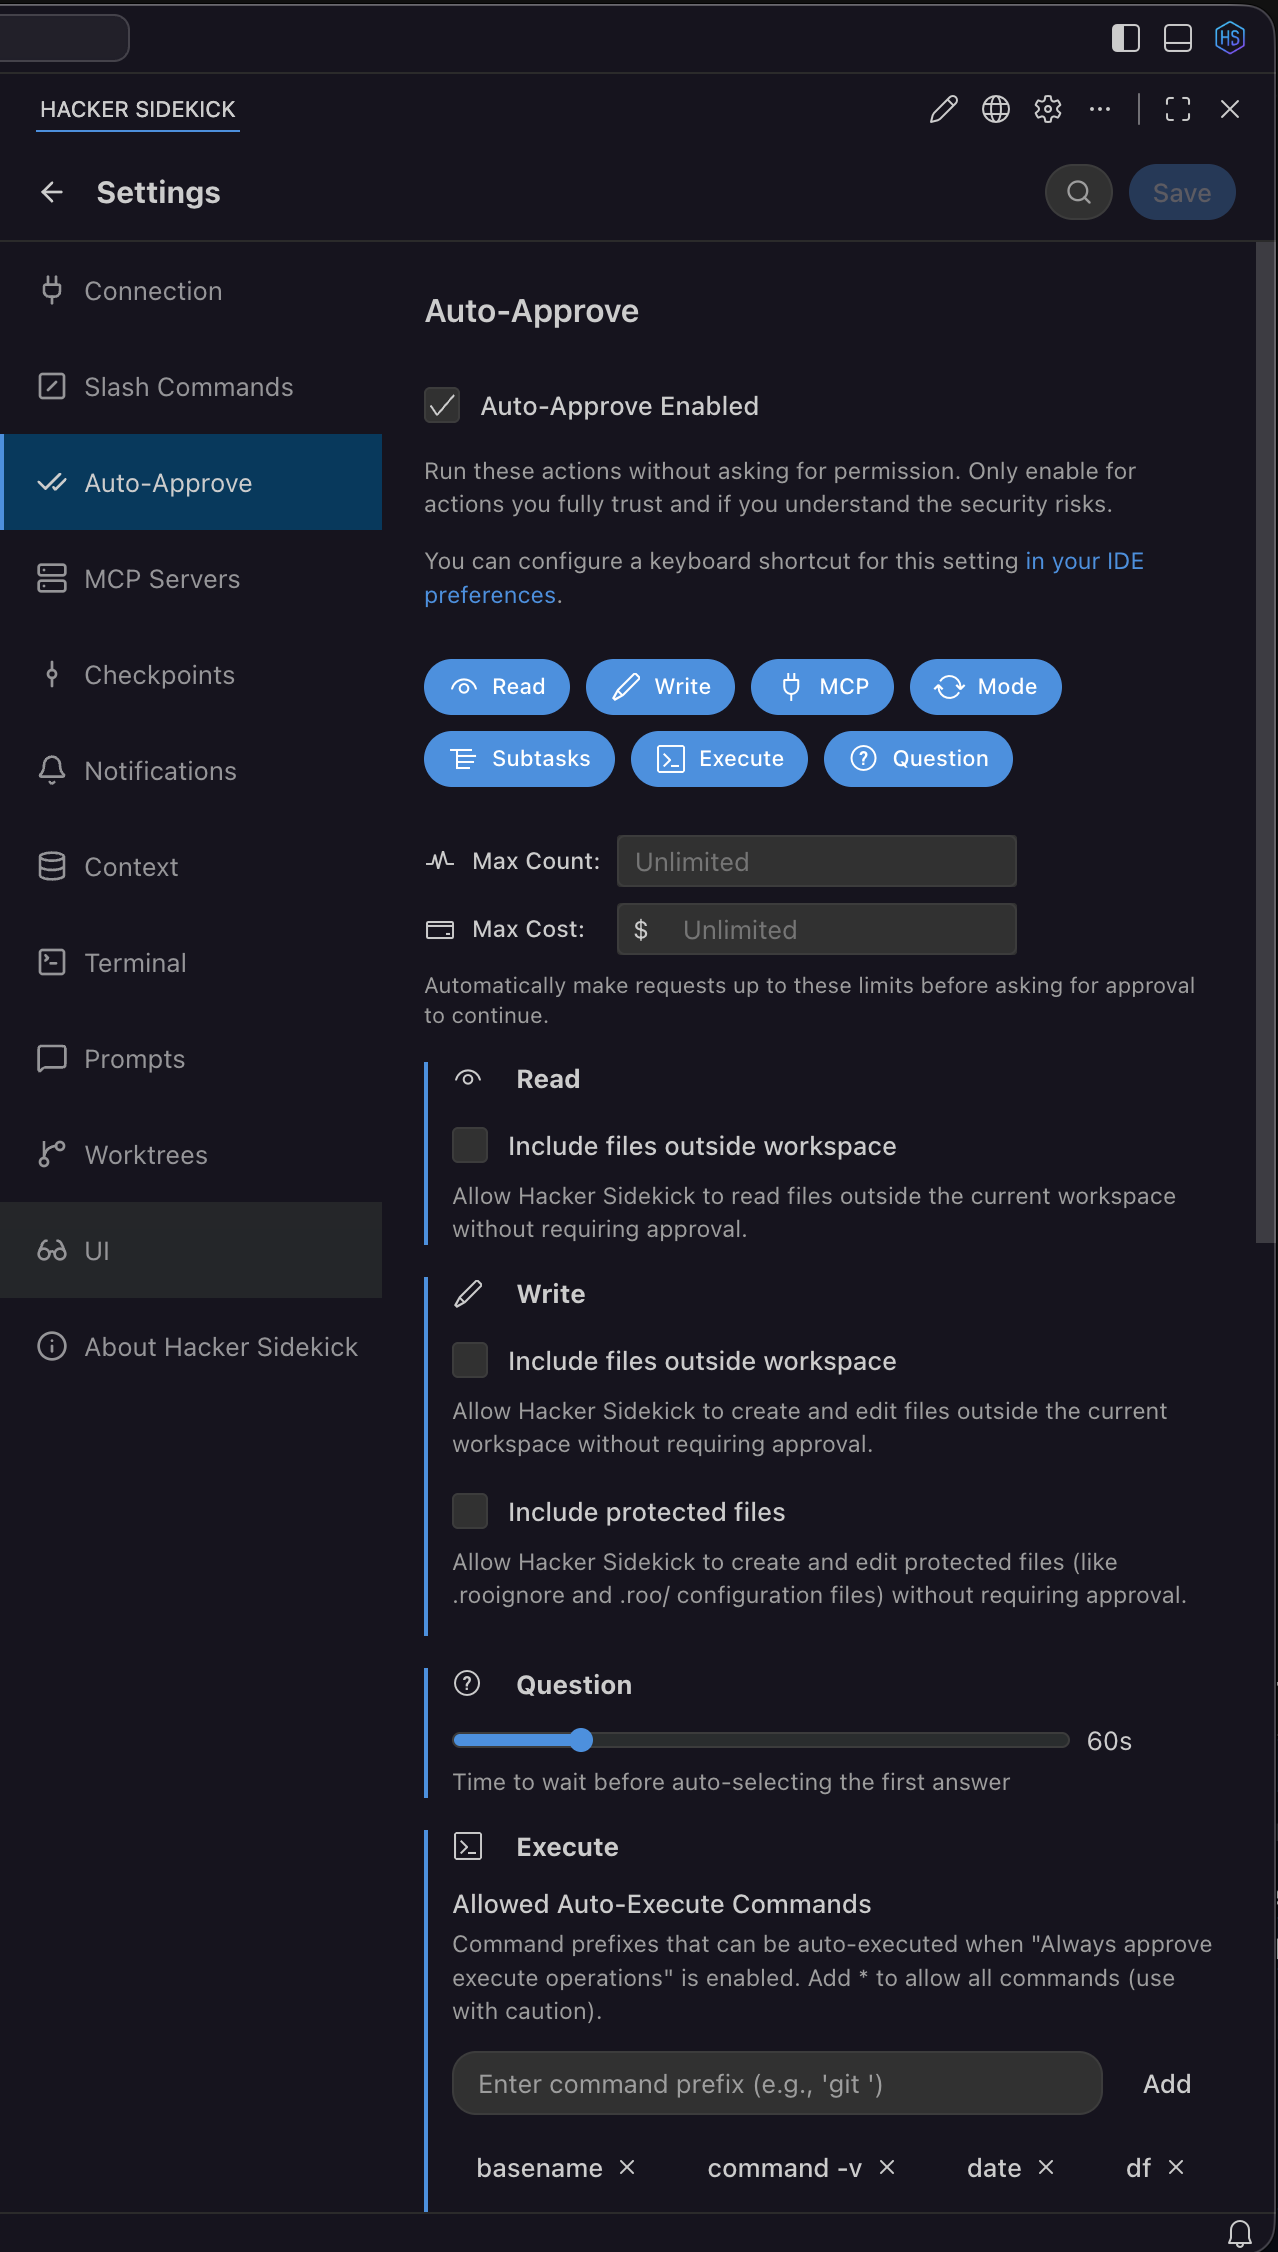
Tool use and terminal commands can require you to click Approve each time, or you can use auto-approval to speed up trusted workflows.
- Settings → Auto-Approve (and the Auto-approve control in the chat view) - Choose what to auto-approve: file edits, terminal commands, subtasks, and MCP tool use. For MCP tools, turn on the MCP item under auto-approve and use the Always allow toggle per tool in the MCP server view for steps you are willing to skip confirmation on.
- The chat UI can show a countdown before auto-approving. You can stop typing in the field to avoid accidental approval while the timer runs.
- Limits - Hitting a request or cost cap under auto-approve can pause the task. The UI offers Reset and Continue if you want to clear the count and go on. Treat that as a policy decision, not a free pass in production systems.
Security - In unfamiliar repositories or when commands could touch credentials or the network, keep approval manual. Auto-approving MCP tools is powerful and should match your org access policy.
Checkpoints
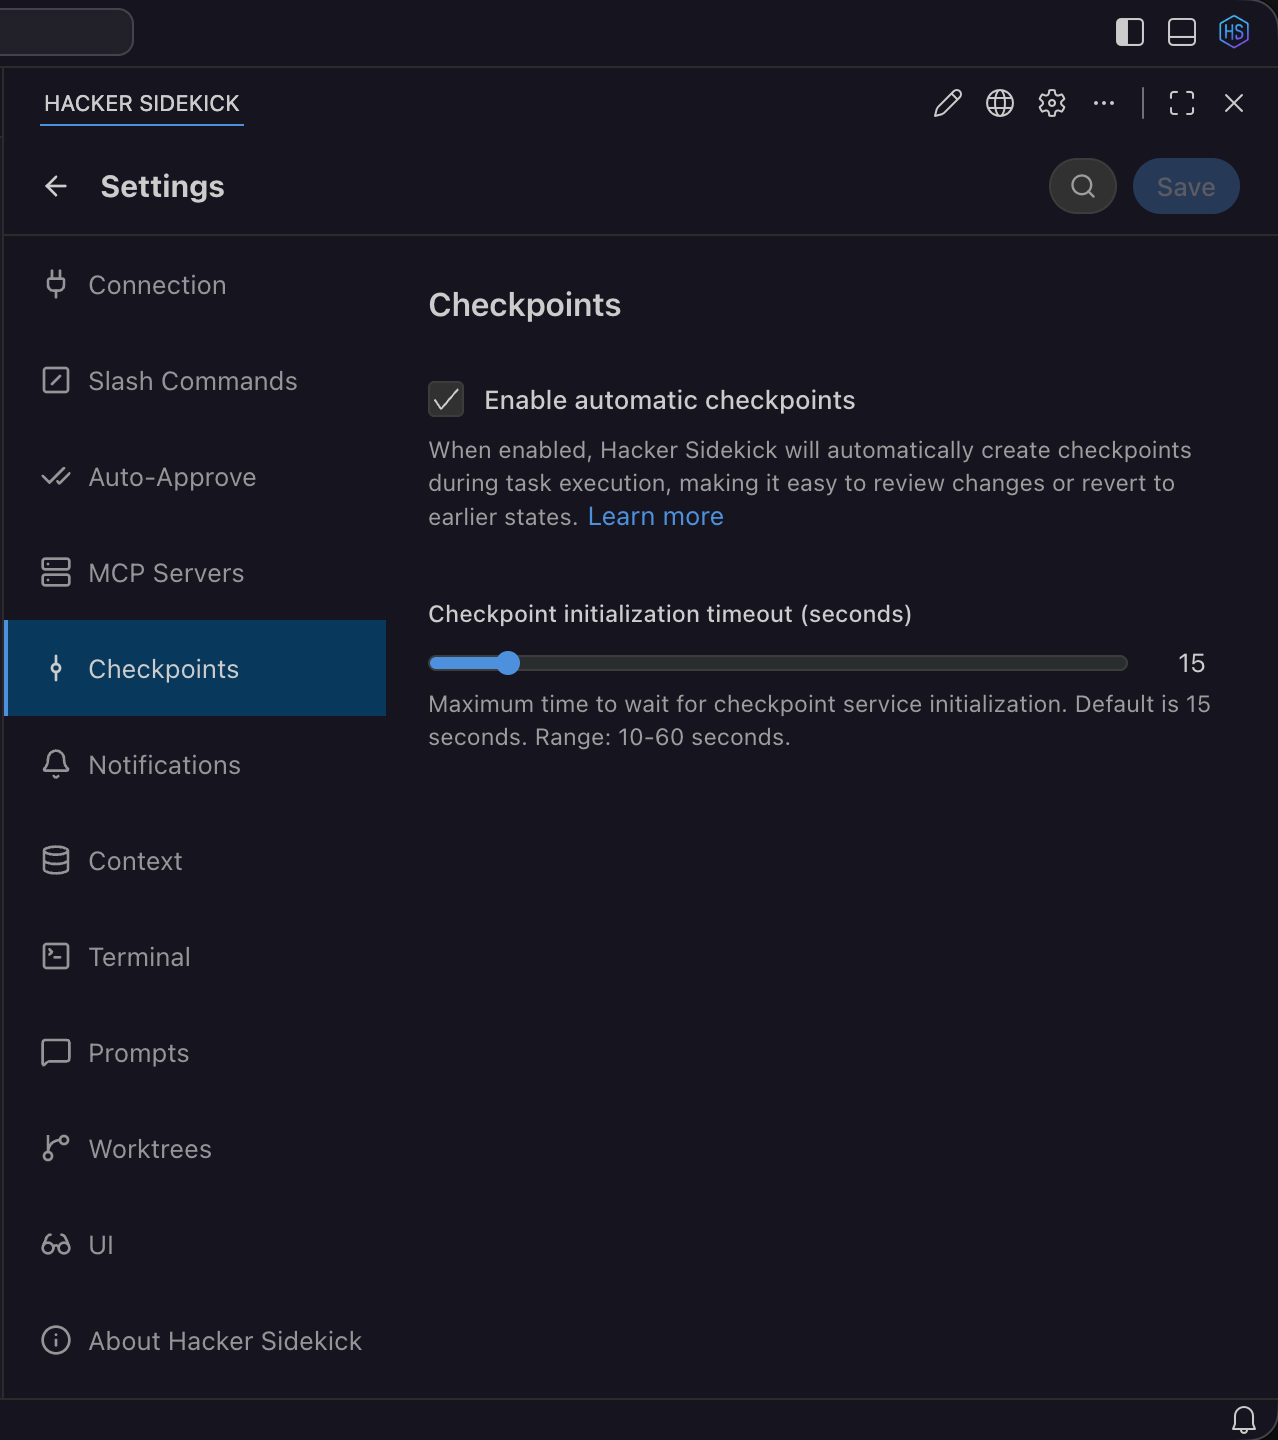
Checkpoints take snapshots of the task file state so you can roll back before risky refactors, experimental edits, or malware-adjacent work.
Automatic checkpoints are on by default. In Settings → Checkpoints you can change the checkpoint initialization timeout if a very large repository needs more time to initialize, or turn checkpoints off entirely if a task is waiting too long on startup.
- In the task timeline, use Restore checkpoint, View changes since this checkpoint, and related actions when you want a known-good state. Editing an older message can offer to restore the checkpoint for that point in the conversation.
Model routing
For public Hacker Sidekick, the editor routes tasks to different models automatically—you do not pick a model for each message.
| Task type | Model |
|---|---|
| General questions, coding help | Fast general-purpose model |
| Offensive security (exploit dev, vuln analysis, payload crafting) | Domain-tuned security model |
Workspace indexing and context
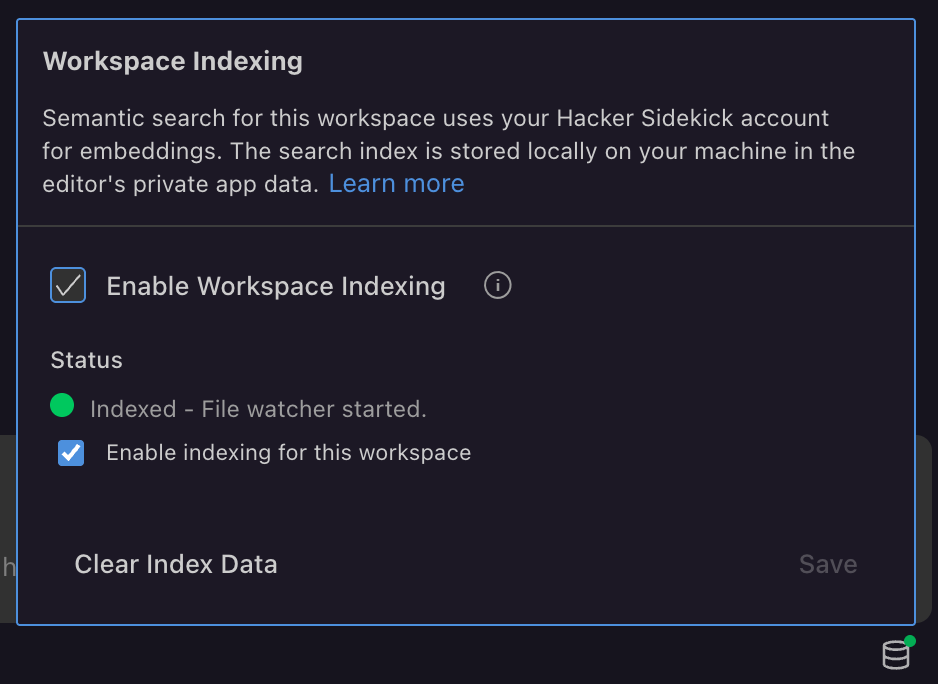
Workspace indexing scans your open project and builds a semantic search index using hsk-emb embeddings (requested through your Hacker Sidekick account). When you ask a question, the assistant pulls relevant workspace context—files and functions—into the task without pasting the repo into chat.
The search index is stored locally on your machine in the editor’s private app data. Your source files stay in your workspace; embeddings are fetched for indexing, not used to train models.
| Control | Purpose |
|---|---|
| Enable Workspace Indexing | Master toggle for the feature |
| Enable indexing for this workspace | Turn indexing on or off for the folder you have open |
| Status | Whether the workspace is indexed and the file watcher is running |
| Clear Index Data | Remove local index data for this workspace |
Settings path: Settings → Workspace Indexing.
Modes, slash commands, skills, and worktrees
- Modes, slash commands, skills, and worktrees - Modes and slash commands structure repeatable work. Skills (global and project) add reusable playbooks. Worktrees support parallel lines of work where configured.
- Custom tools (experimental) - Under Settings → Experimental, Enable custom tools lets the assistant load TypeScript or JavaScript tools from .roo/tools in the project (or a global user directory that the settings describe). That is off by default. When you enable it, those tools are auto-approved, so use it only in environments and repos you trust.
Connection
- Public Hacker Sidekick - Sign in from Settings → Connection; see Connection and sign-in (app).
- Hacker Sidekick Enterprise - Enter the base URL and per-user key from your administrator; see Hacker Sidekick Enterprise.
Reset and switch between account types
For connection and some provider fields, the UI can offer Reset to defaults (or similar) to restore the shipping URL and model defaults for Hacker Sidekick or your current provider row.
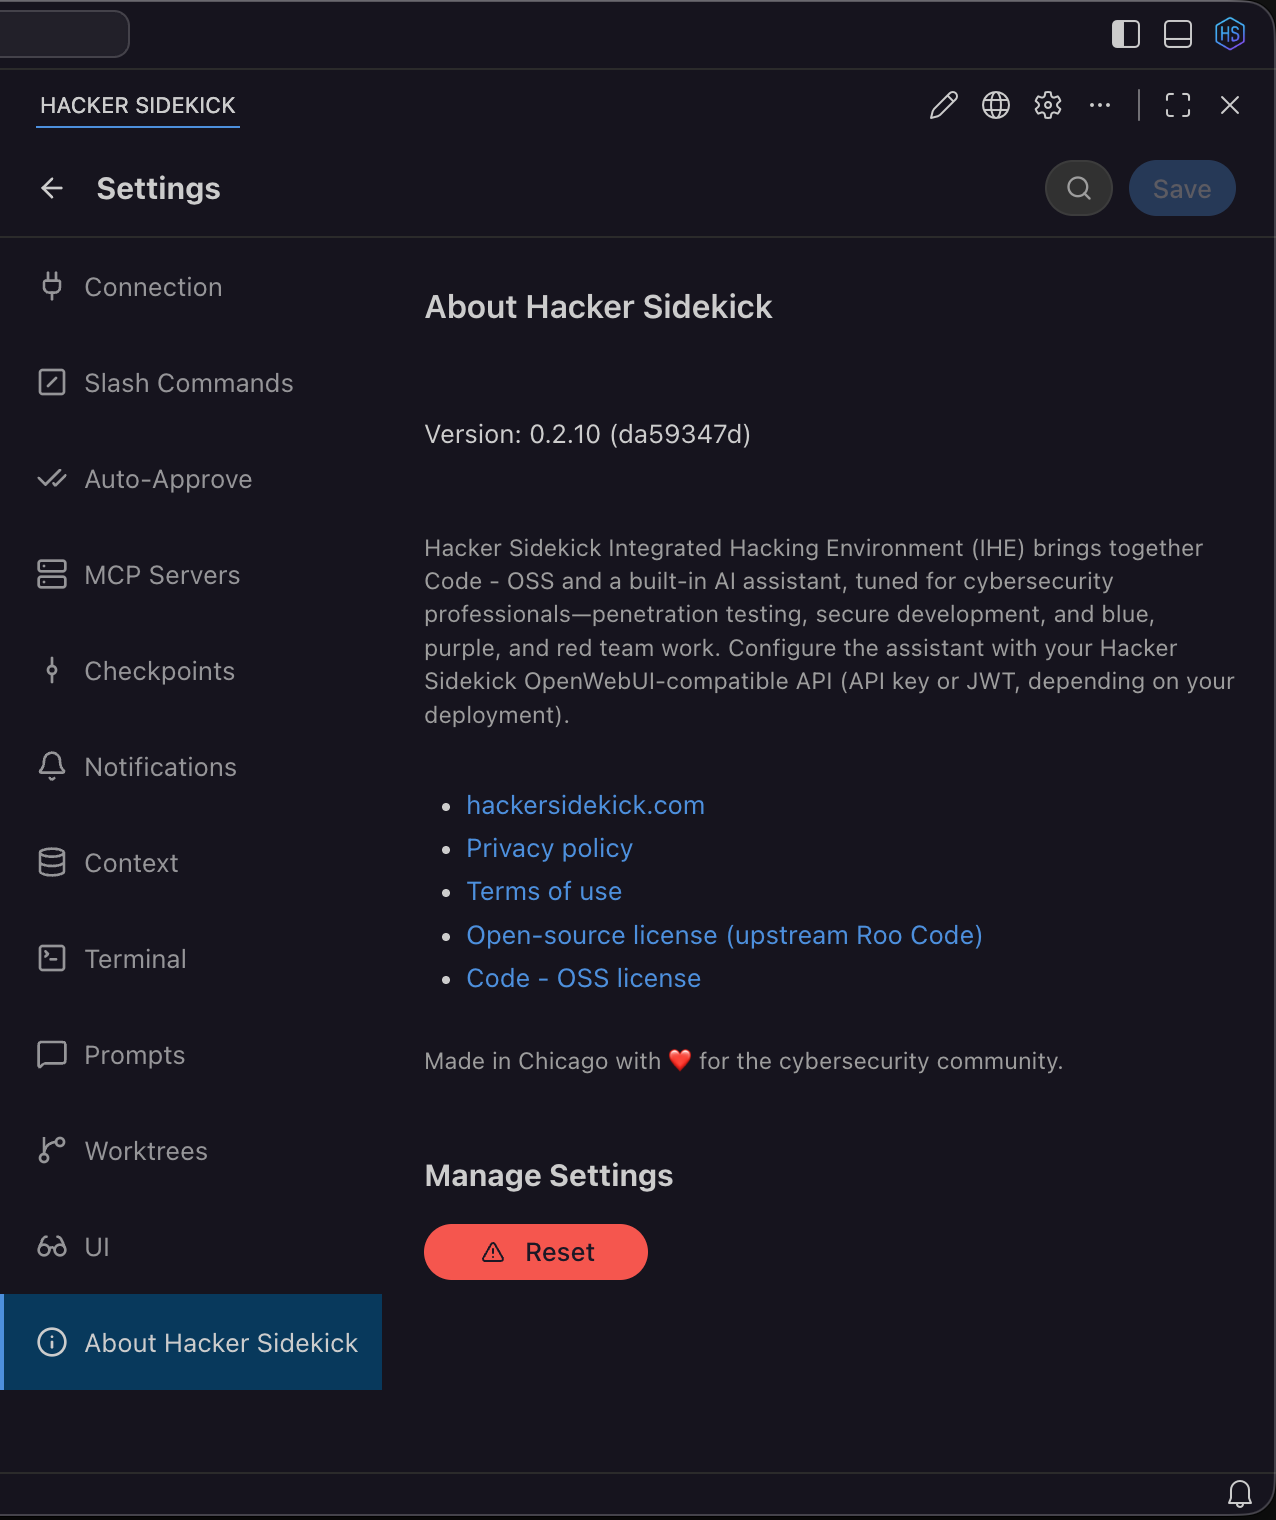
"Reset" can mean different things. Pick the one you need.
| Goal | What to do |
|---|---|
| Sign out of a public browser session | In Connection settings, use the log out link when you are logged in with a Hacker Sidekick account (see Connection and sign-in). |
| Stop using Hacker Sidekick Enterprise and use the public service again | Follow Switching back to the public service in Hacker Sidekick Enterprise. |
| Provider or model tuning | In provider or custom model UIs, use Reset to Defaults where a row offers it. That does not erase OS-level app data. |
| Auto-approve or checkpoint limits | Auto-approve may show Reset and Continue when a cap trips. Checkpoints can reset defaults in Settings (including timeout). |
| Full local reset (rare) | Use your OS uninstall and clear app data or user profile for the product. Follow your IT policy. This site does not document destructive file paths. |
Product demos on video
- Getting the Most out of Hacker Sidekick (0.3) — platform update: model routing, workspace indexing, auto top-up, and threat intel MCP
- Exploiting CVE-2026-23918 with Hacker Sidekick
- RCE exploit on n8n with one prompt (CVE-2026-21858)
More on the Videos page and YouTube channel.
See also
- Hacker Sidekick app - sign-in and updates
- Account portal - plans, usage, auto top-up
- Hacker Sidekick Enterprise - private deployment, keys, and Enterprise Connection UI